The Command Center is the control panel for a single event. It brings together the event's performance, sharing tools, door tools, and settings in one place.
In the left menu, select Events.
Find your event and select the ⋯ menu at the end of its row.
Select Open Command Center.
The panel opens over your events list. Select the X in its top right corner to close it.
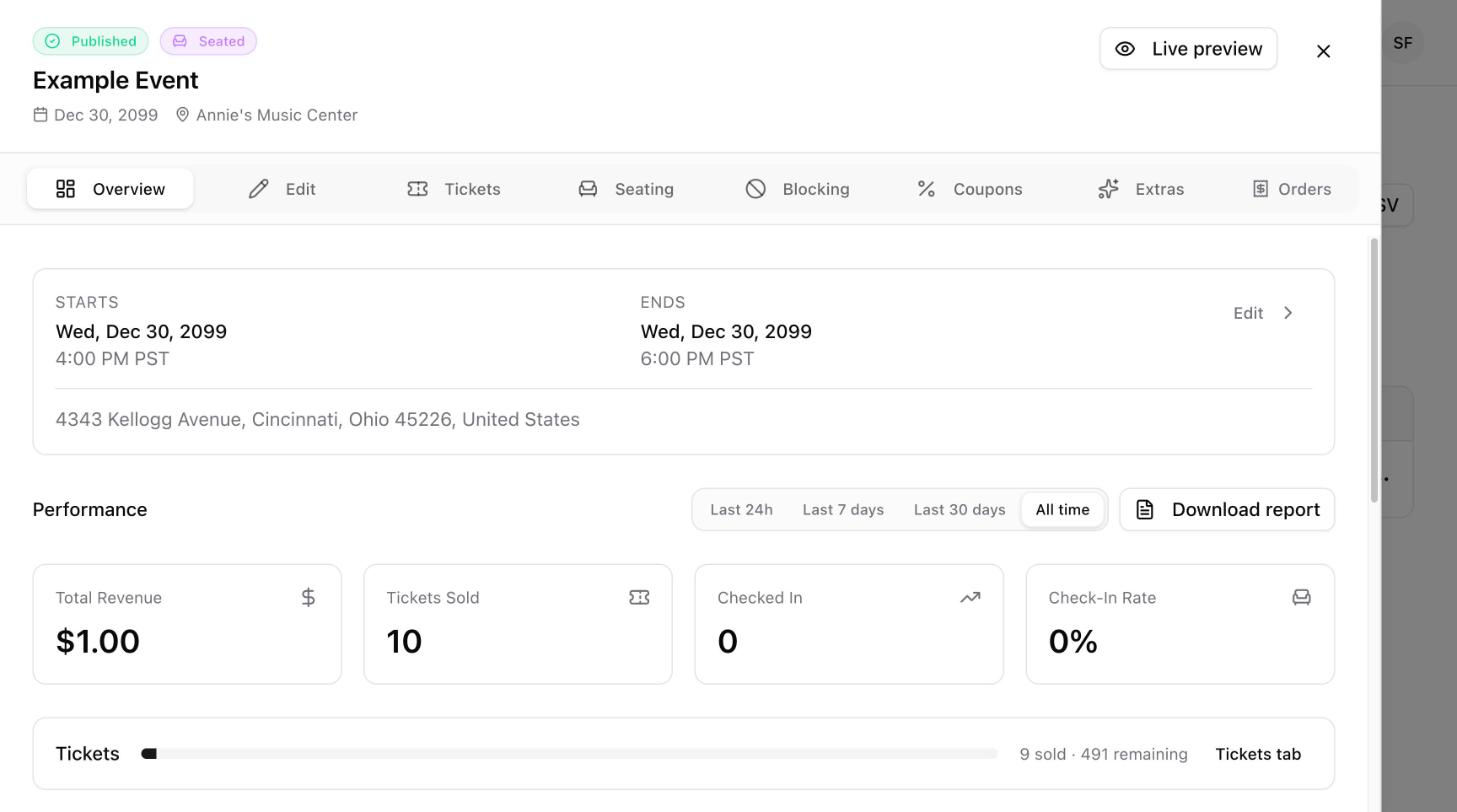
The top of the panel shows the event's name, status, date, and venue. Below that, eight tabs take you to each part of the event.
Tab | What you do there |
|---|---|
Overview | See performance, share the event, and open the door tools. |
Edit | Change the event's status, details, date, image, location, and highlights. |
Tickets | Add, reorder, and archive ticket types. |
Seating | Set seat categories and their prices for reserved seating events. |
Blocking | Take seats off sale or put them back on sale. |
Coupons | Create and manage discount codes. |
Extras | Turn on presale access, custom fees, reminder emails, public live tracking, and FAQs. |
Orders | See the orders placed for this event. |
Select Live preview at the top of the panel to see how the event page looks to buyers.
The Performance section on the Overview tab shows four numbers for the event.
Metric | What it shows |
|---|---|
Total Revenue | Money collected for this event. |
Tickets Sold | Number of tickets sold. |
Checked In | Number of tickets scanned at the door. |
Check-In Rate | Share of sold tickets that have been checked in. |
Use Last 24h, Last 7 days, Last 30 days, or All time to change the time range.
Select Download report to save a report for the event.
The Tickets bar shows how many tickets are sold and how many remain. Select Tickets tab to jump to your ticket types.
The Share section gives you four ways to get your event in front of buyers.
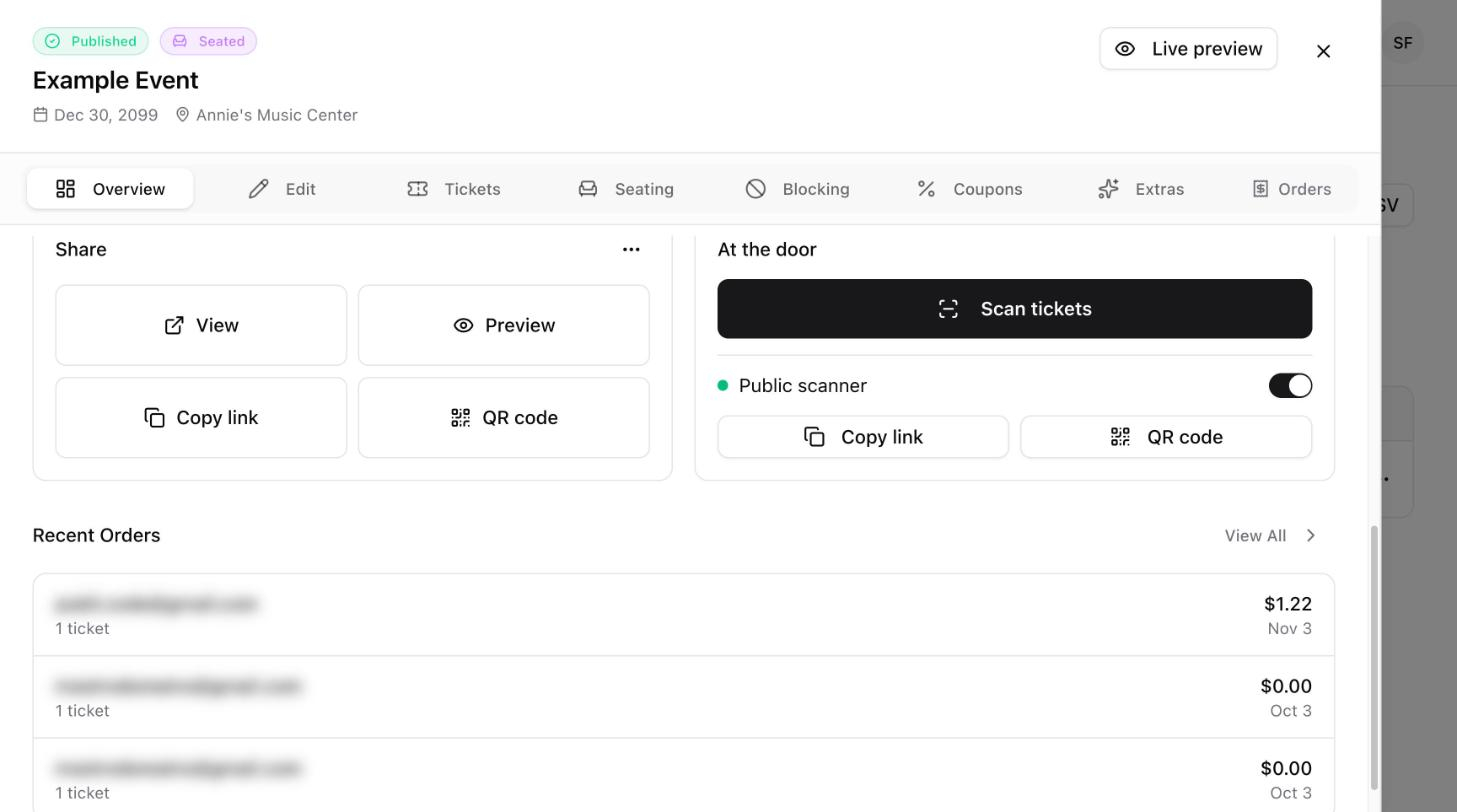
Button | What it does |
|---|---|
View | Opens the public event page in a new tab. |
Preview | Shows a preview of the event page. |
Copy link | Copies the event page link to paste into emails, texts, or social posts. |
QR code | Shows a QR code that opens the event page when scanned. |
Select the ⋯ menu in the Share section and choose View organizer page to open the public page that lists all of your events.
The At the door section is where you start checking in attendees.
Select Scan tickets to open the ticket scanner.
Turn on Public scanner to create a scanner link you can share with door staff, then use Copy link or QR code to send it to them.
Recent Orders at the bottom of the Overview tab lists the latest purchases for the event. Select View All to see every order.
