You can sell tickets from your own website by adding a SeatFun button or widget to it. There are three options, and each one gives you a short piece of code to paste into your site.
Option | What it adds to your site | Best for |
|---|---|---|
Buy Tickets Button | A button that links to your ticket page. | Any page where you mention the event. |
Single Event Card | A compact card with the event's image, date, title, venue, and a Get Tickets button. | Blog posts and sidebars. |
Organizer Event Grid | A grid of all your upcoming events that updates automatically when you add new ones. | Your homepage or events page. |
In the left menu, select Marketing.
Choose your event from the menu at the top of the page.
Select the Embed & Widget tab.
Under Buy Tickets Button, choose a Style Preset: Solid, Outline, Pill, or Minimal.
Edit the Button Text, for example Get Tickets.
Set the Background and Text Color to match your website, and drag Corner Radius to round the corners.
Check the result in Live Preview.
Select Copy HTML and paste the code into your website.
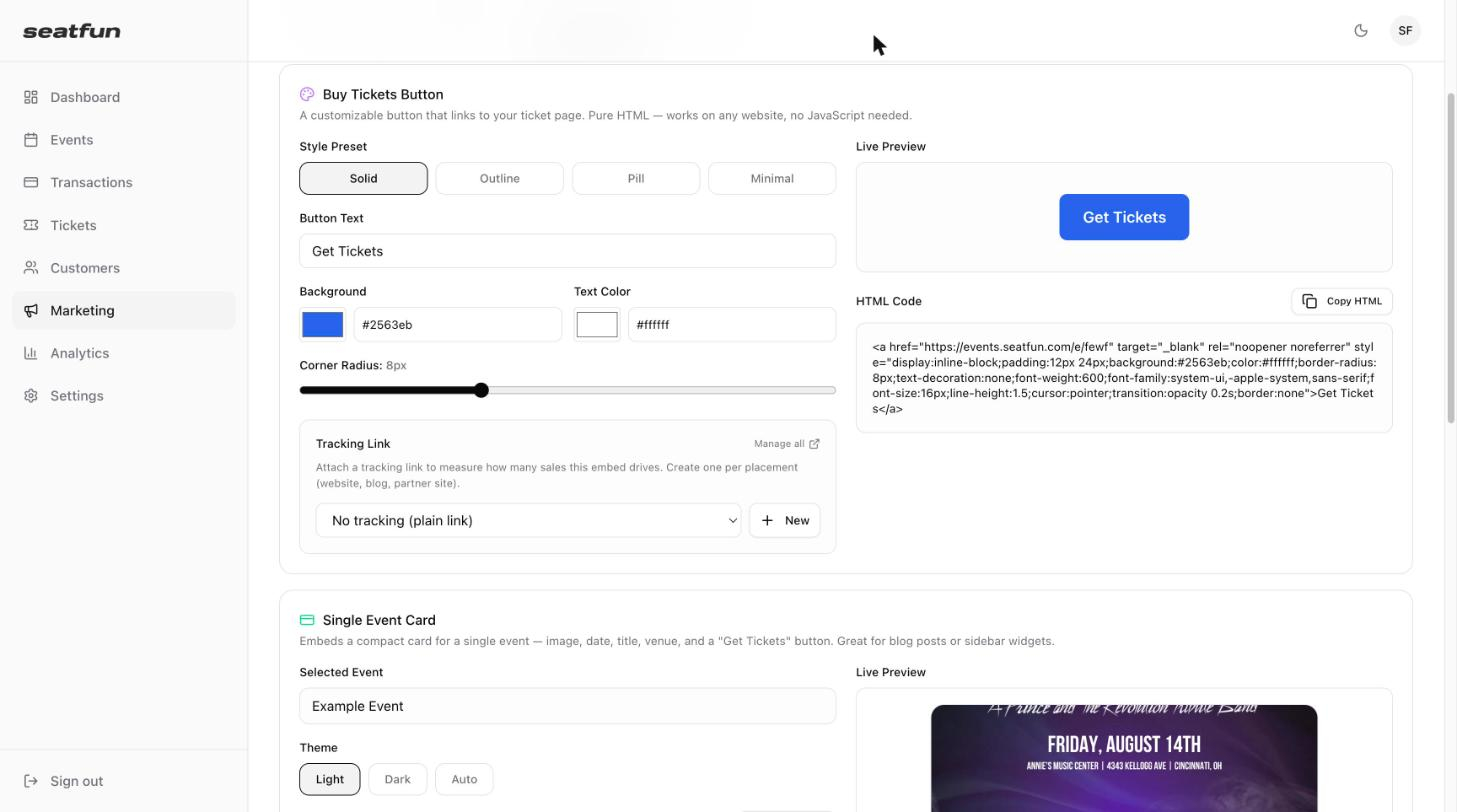
The button is plain HTML, so it works on any website and does not need JavaScript.

Under Single Event Card, check that the right event is shown in Selected Event.
Choose a Theme: Light, Dark, or Auto.
Check the result in Live Preview.
Select Copy Code and paste the code into your website.
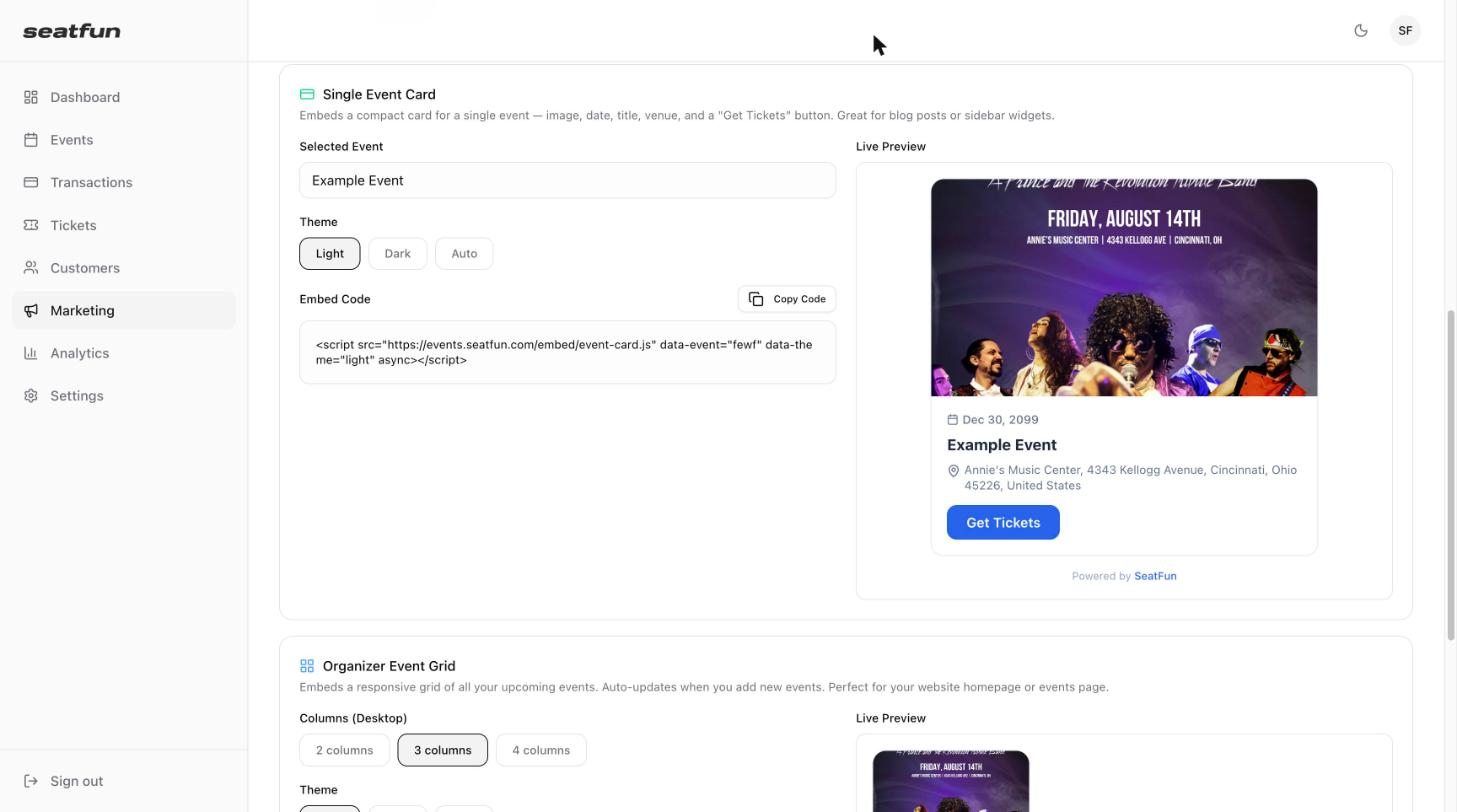
Under Organizer Event Grid, choose how many Columns to show on desktop: 2, 3, or 4.
Choose a Theme: Light, Dark, or Auto.
Check the result in Live Preview.
Select Copy Code and paste the code into your website.
You only need to add the grid once. New events appear in it automatically.
Website builder | Steps |
|---|---|
WordPress | Go to Pages, then Edit. Add a Custom HTML block and paste the code. |
Squarespace | Go to your page, then Add Section. Add a Code Block and paste the code. |
Wix | Go to the Editor, then Add, then Embed. Add a Custom Element and paste the code. |
On any other website, paste the code into the page's HTML where you want the button or widget to appear.
