
Blocking takes specific seats off sale without removing them from your seating chart. Use it to hold seats for guests, sponsors, production equipment, or accessibility needs. You can release blocked seats at any time to put them back on sale.

Open the Blocking tab
In the left menu, select Events.
Select the ⋯ menu at the end of your event's row, then select Open Command Center.
Select the Blocking tab. Your seating chart loads, with each seat category shown in its own color.
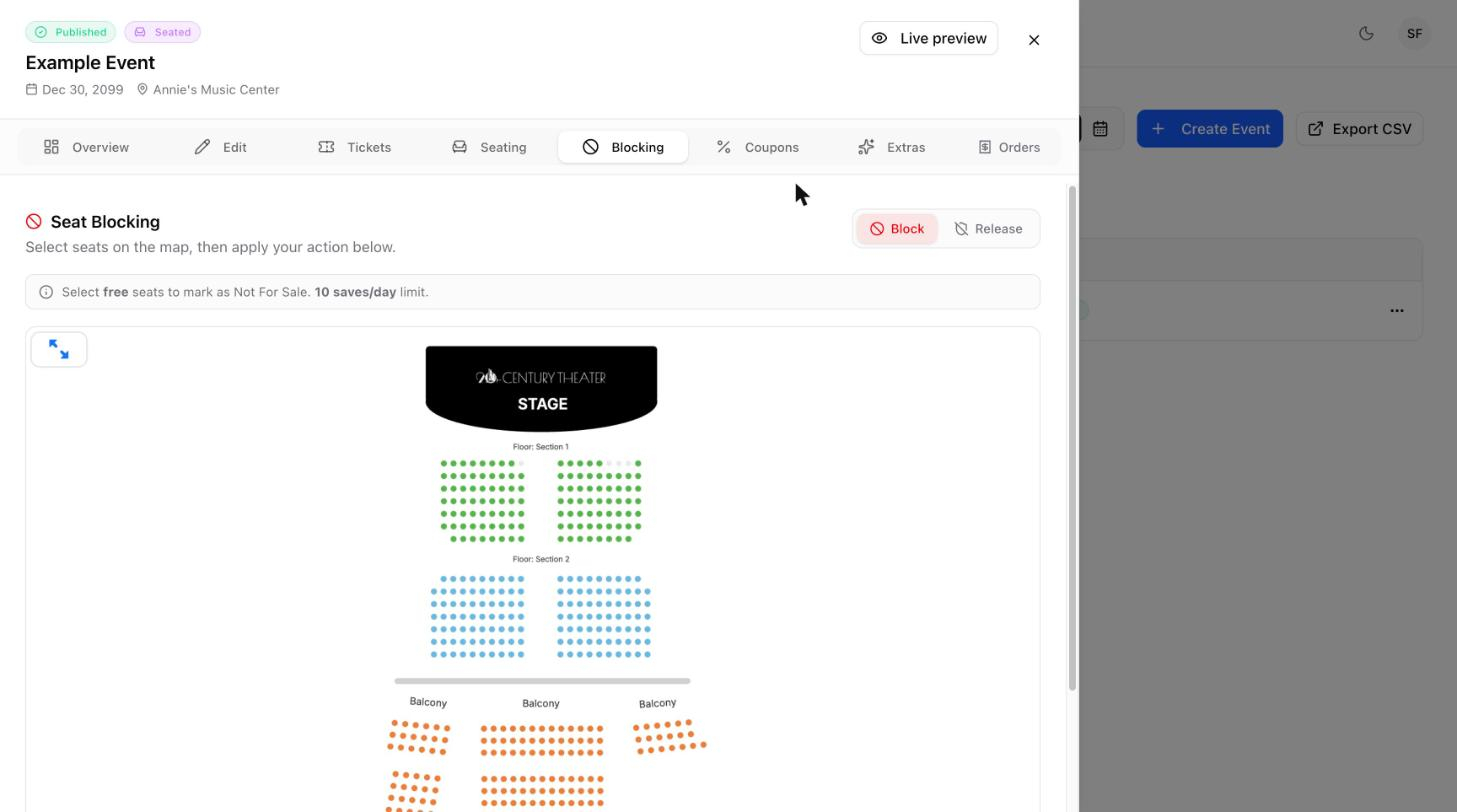
Block seats
Make sure Block is selected in the top right of the tab.
Select the seats you want to take off sale. The map zooms in when you select it so you can see row letters and individual seats.
Check your selection. Selected seats show a check mark, and each one is listed under the map by row and seat number, for example H-1.
Select Block seats at the bottom of the tab. The button shows how many seats you have selected.
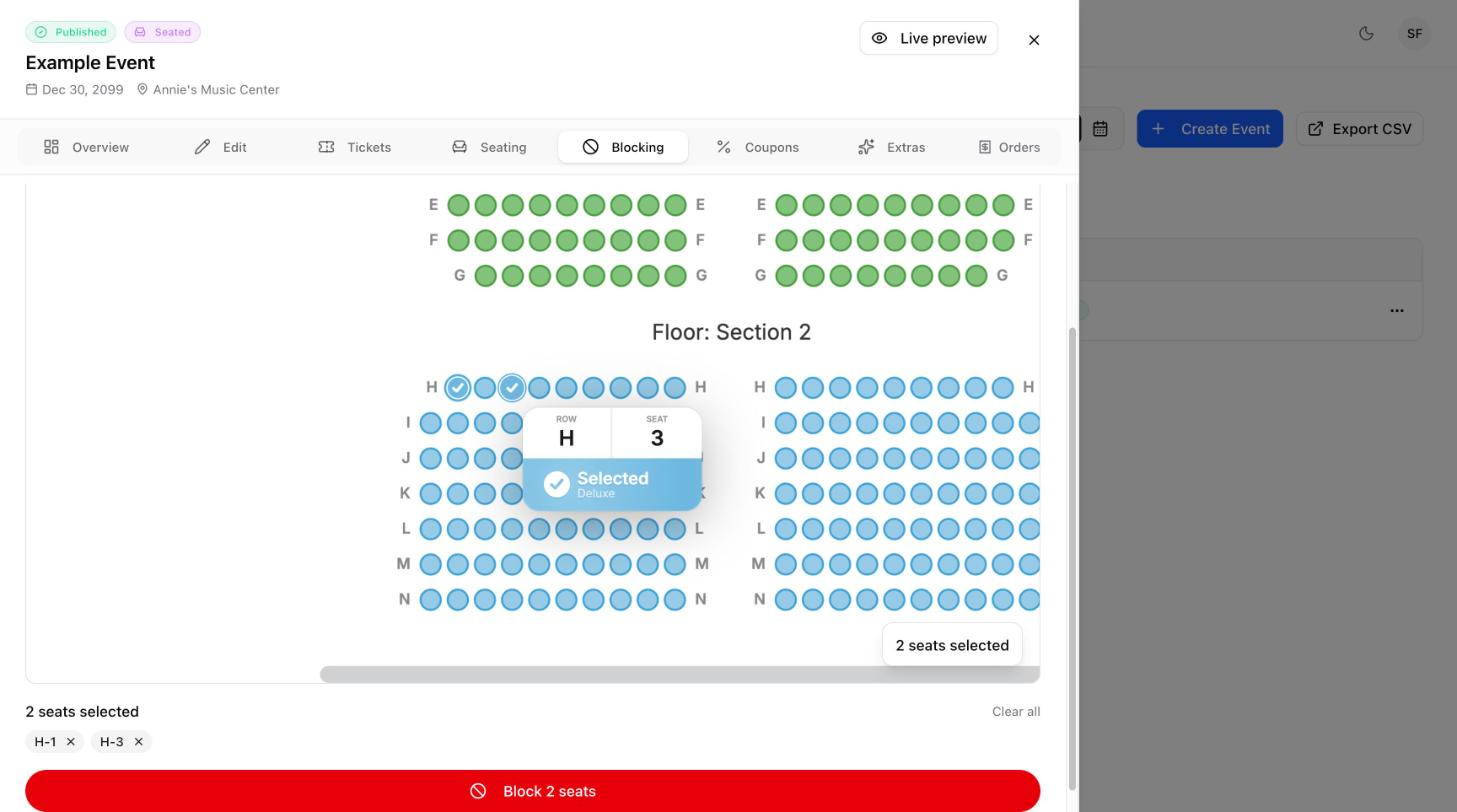
Blocked seats are marked as not for sale, so buyers can't select them at checkout.
Release blocked seats
Select Release in the top right of the tab.
Select the blocked seats you want to put back on sale.
Confirm with the button at the bottom of the tab.
See how many seats are blocked
Open the Seating tab. Each seat category shows its number of blocked seats next to the sold and remaining counts.
Tips for working with the map
Select the expand icon in the top left corner of the map to view it at a larger size.
Hover over a seat to see its row, seat number, and status.